The Bend – Is the Equine Yoga.
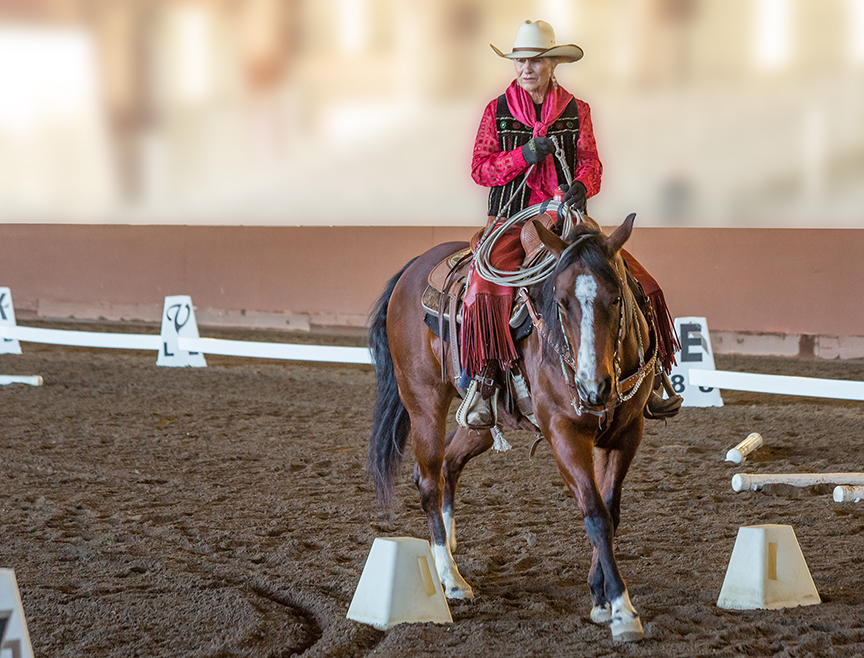
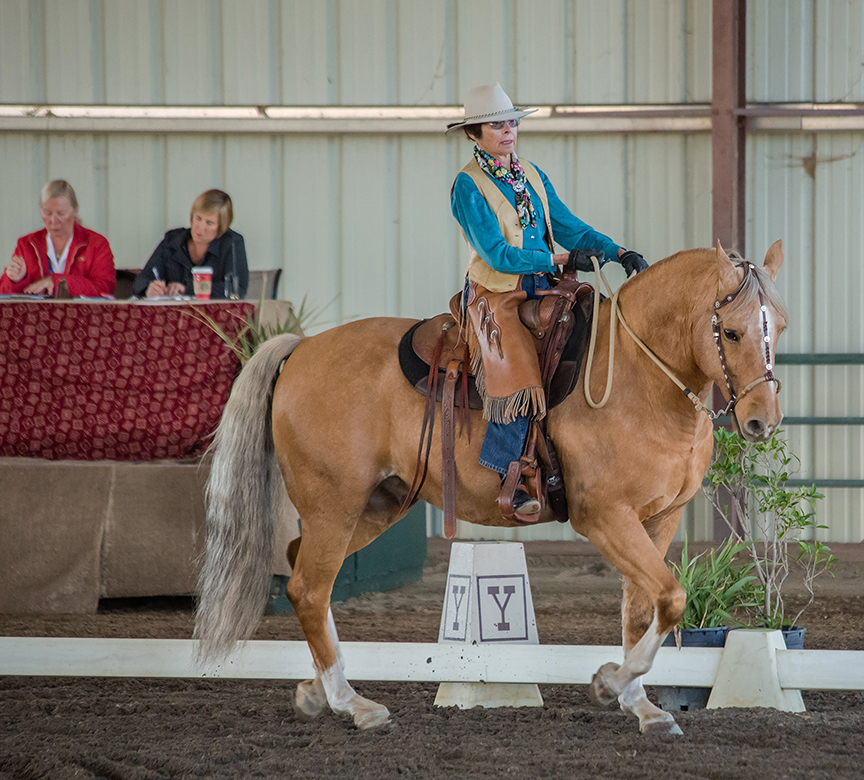
Creating bend in the horse and rider is the equivalent of equine yoga. It strengthens and supples the horse throughout his core. It allows for the horse to evenly develop his spine and engage his frame, creating strength and making the horse travel straighter underneath you—once he has a firm concept of bend (fig. 7.1).

7.1 – Bend is the key for all of the things you work to build in your horse including suppleness, straightness, a shortened frame, and self-carriage. It all starts with bend
Like you, most horses are naturally either right- or left-sided, to a degree. This phenomenon can be exaggerated in the horse due to our proclivity for handling and leading the horse primarily on the left side. Other natural tendencies can contribute to the “handedness” of the horse. Whichever theory you subscribe to, it is
hard to ignore that some things will come more easily to a horse in one direction than the other.
Through the teaching and practice of bend, you can help to even out this natural crookedness in your horse for better athletic and more correct movement.
When considering bend in the horse, you need to keep in mind that the horse, unlike you, is a quadruped. The horse moving on a perfectly straight line moves on two even tracks.
The left front and hind step on one track, while the right front and hind step on another track. Ideally, this is the same when moving on
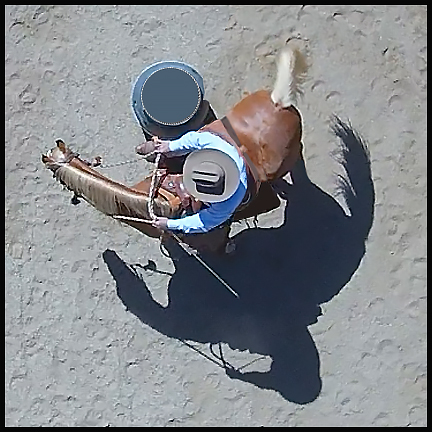
a straight line as it is in a circle. If you view the horse on a 10-meter circle from above, you can appreciate the anatomic changes that occur when the horse enters into a bend.
(Fig 7.2. & 7.3.)

The railroad track is a great way to visualize the shortening required of the inside of the horse when he enters onto a bending line. The inside legs (in green) must take shorter steps than the outside legs (in red) for the horse to remain traveling on two tracks around the bend.
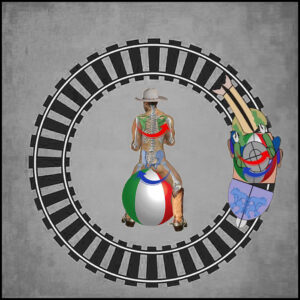
The railroad track is a great way to visualize the shortening required of the inside of the horse when he enters onto a bending line. The inside legs (in green) must take shorter steps than the outside legs (in red) for the horse to remain traveling on two tracks around the bend.
The outside track is obviously longer than the inside track on a circle. This means that when the horse is perfectly bent from head to tail and evenly arced through the body, the outside legs will take longer steps than the inside legs. This also means that the muscles of bend on the inside are in flexion, while the muscles of the bend on the outside are being stretched and lengthened.
Keeping balance and forward movement through the bend will help ensure that the horse continues to engage the entire body without just bending the head and neck, which is a common pitfall. When the head and neck are the only parts of the horse that are bent, it is easy to imagine the hindquarters and rib cage drifting out of the circle so that the inside hind leg is on the outside track instead of the inside track.
This shortening of the horse one side at a time is an elemental exercise in developing collection in the frames and gaits of the horse.
The Skeleton Presents Itself
Rider posture and aids are the keys to building proper bend in the horse. When you ride in unison with your horse, your balance and posture help the horse to understand the position that his body is being asked to take below you. This concept of your skeleton “presenting itself” to the horse is vital in the discussion of body position in the rider, in all the lateral movements, as well as in the development of bend.
While you are not a quadruped, the horse is such a natural student of body language, reader of energy and nuances of balance, that when your are consistent, the horse can learn to follow the lead of your body. Giving the horse guidance and instruction through the skeleton goes beyond aids and cues and is more like a direct connection to the horse at his very core. While it all sounds very Zen and New Age, equitation and balanced riding has long been recognized as an art.
If you can visualize the corresponding piece of the equine skeleton in your own body, it becomes a matter of habit to “talk to the horse” through your skeleton. When you ride in cadence and time with the horse beneath you, it also becomes easier to feel how your body moves with the horse’s skeleton below you. You can influence each of the sections of the horse through your aids and individual body parts.
Now, instead of Maneuver A requiring Cue B, you can learn to talk to your horse through body position and energy. Riding becomes less and less about mechanics and more and more about art; a dance between horse and rider moving fluidly through space.
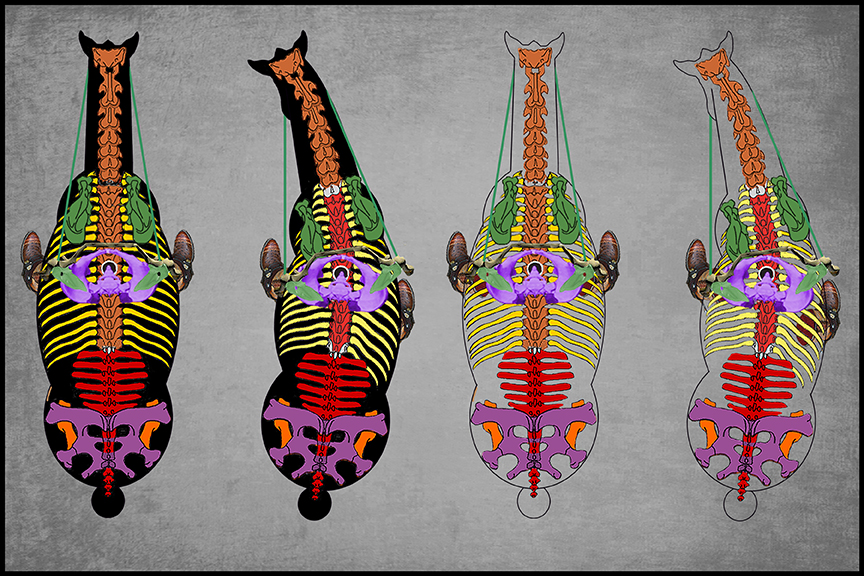
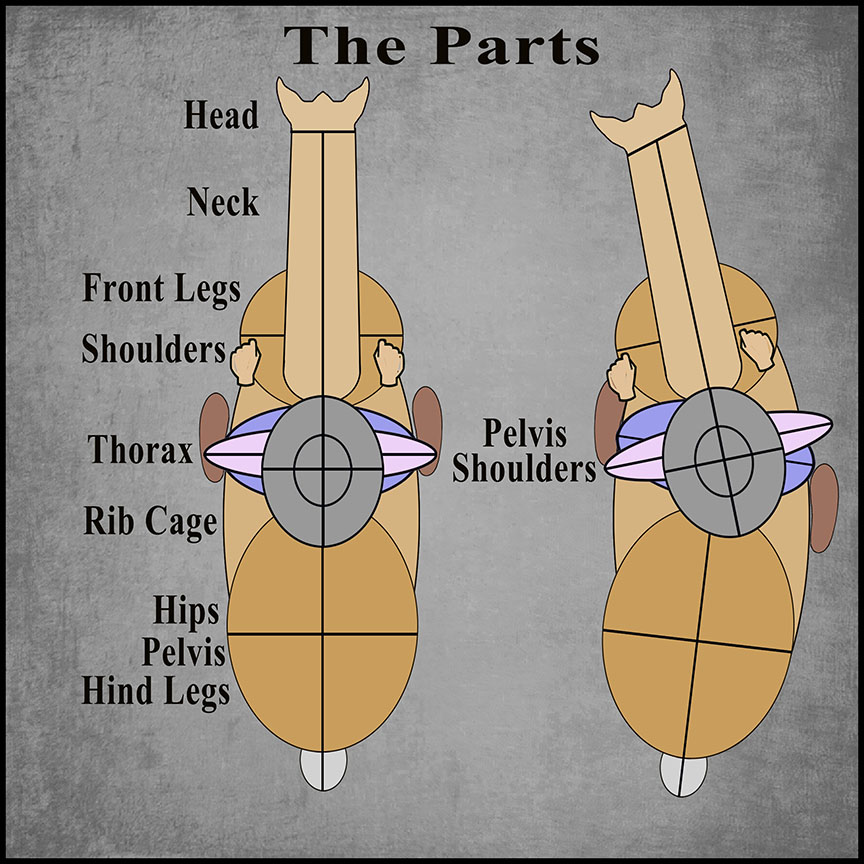
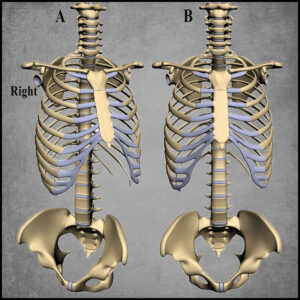
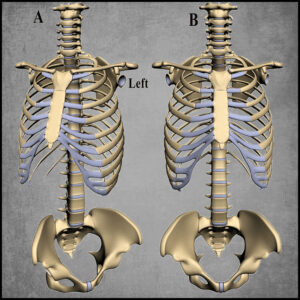
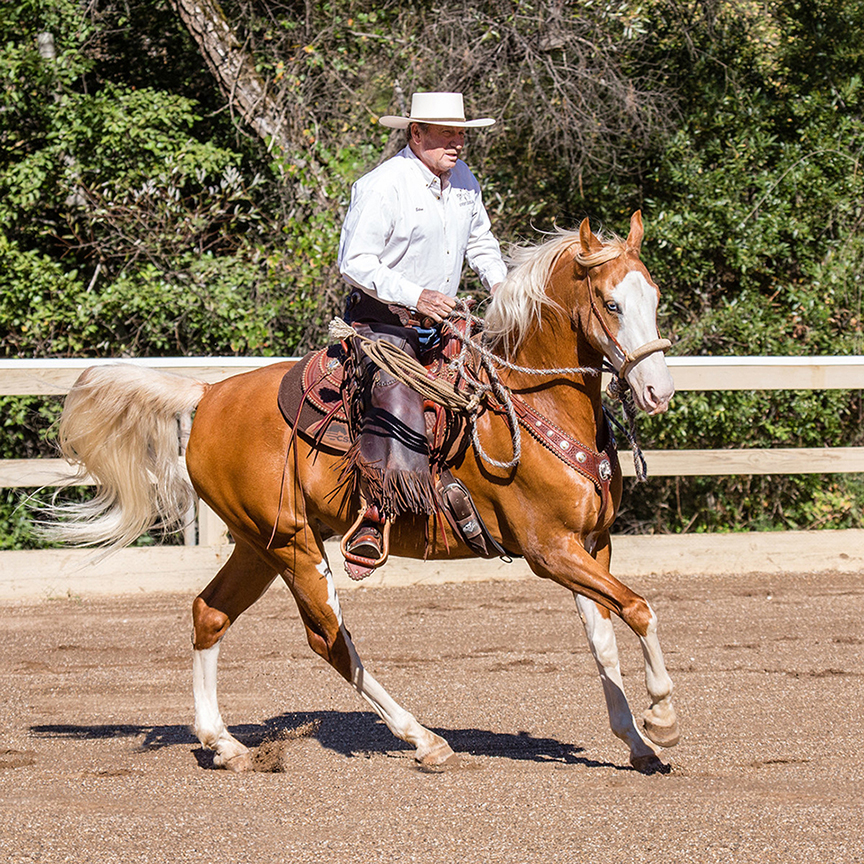
7.4.-Visualization of the bend in both equine and human skeletons: When the horse is bent, his pelvis tilts to the outside of the bend while his shoulders tilt inside the bend. Your skeleton does the same. Your shoulders point into the bend while your pelvis points out.
The position of your skeleton in relation to the horse’s skeleton is especially crucial in the development of bend (fig. 7.4). When the horse enters into a 10-meter circle, the head and neck turn to look into the bend so that just the corner of the eye is visible. If the entire neck is bent evenly from withers to atlas, the neck telescopes slightly, filling the bend evenly through each of the vertebrae, and allowing the head to remain vertical. The mandible tucks slightly under the wing of the atlas. If there is rotation of the head and neck in the bend, either the nose will come first or the jaw will stick out, and the head will be rotated into the bend on the vertical plane.
This is incorrect and will, typically, result in the horse’s inside shoulder “falling into” the bend while the outside hip drifts outward.
The inside shoulder should move back slightly into the bend, while the outside shoulder moves forward slightly, holding the horse onto the outside track. The rib cage, which has minimal lateral flexion, does move slightly away from the bend. The pelvis moves slightly forward to the inside of the bend, allowing the inside hind leg to step deeper under the body, while the outside hind leg makes a slightly longer step on the outside track.
How does this translate to your skeleton? Your skeleton needs to mirror the horse’s skeleton in the bend, and vice versa (fig. 7.5).
This means that as the horse’s shoulders look to the inside of the bend, so must your shoulders look to the inside of the bend. Your inside shoulder is back slightly as your outside shoulder is forward slightly. Your rib cage shortens and moves slightly to the outside of the bend. Your inside leg is positioned at the area of the greatest flexibility of the rib cage in the proximity of the girth. Your pelvis is rocked slightly forward to the inside and slightly back to the outside of the bend, while the outside leg is back slightly to encourage the bend in the horse’s skeleton to continue (figs. 7.6 & 7.7).
Because we are bipeds and not quadrupeds, our skeleton is not normally experiencing a twist like this as we walk in bend. When a human walks in a circle, the shoulders and the hips will, by necessity, follow in the same alignment. This is not true in the horse. You need to remember that the horse’s body moves through space differently than yours does. While initially this position will feel awkward to the rider, with practice, the horse will read the body position of the skeleton in the absence of the application of aids to establish bend just through body positioning. This is the essence of good Soft Feel and riding the horse from the feet up.
Beginning of Bend: Lateral Flexion
Bend in the young horse begins as you teach the horse lateral flexion, following the direction of the rein, and looking to the hand. Here is where you establish the correctness of bend through the head and the neck, with softness at the poll and engagement of the entire cervical process. Indeed this can and should be taught from the ground before the horse is even introduced to the bit.
Standing at the horse’s side you pick up soft contact on the lead rope or the side of the halter and ask the horse to “give” by bringing the head and neck over while remaining perpendicular
to the ground and soft through the poll. There are some schools of thought that encourage the horse to reach all the way around to his girth area in a full lateral flexion from the ground in a halter. While there is merit to this exercise, this is different than beginning to establish bend. A Cowboy Dressage horse should learn to come to the bend that is asked of him through the reins or hands of the rider. If any small pressure says to the horse to bend all the way to the girth, you will get over-flexion of the neck and stiffness through the ribs and pelvis. Instead, it is helpful to teach the horse to follow the feel of lateral flexion in increments, coming as far as you request but no farther, and holding that flexion with slack in the rein or the lead rope. When release and reward is given for proper flexion rather than extreme or rapid flexion, the horse is taught form to function and it paves the way for correctness of bend (fig. 7.8).
From the saddle, you can introduce bend similarly. By opening the inside hand and making contact on middle of the bit, the horse can learn to look to the hand into the bend. Looking into the bend and following that direction helps to soften and open the bend through the head and the neck. The outside rein is as important when
initiating bend through the head and neck. The outside rein needs to lengthen allowing the horse the space to lengthen the muscles on the outside of the neck. Soft rein pressure laid against the out- side shoulder keeps the shoulder from drifting outward in the bend.
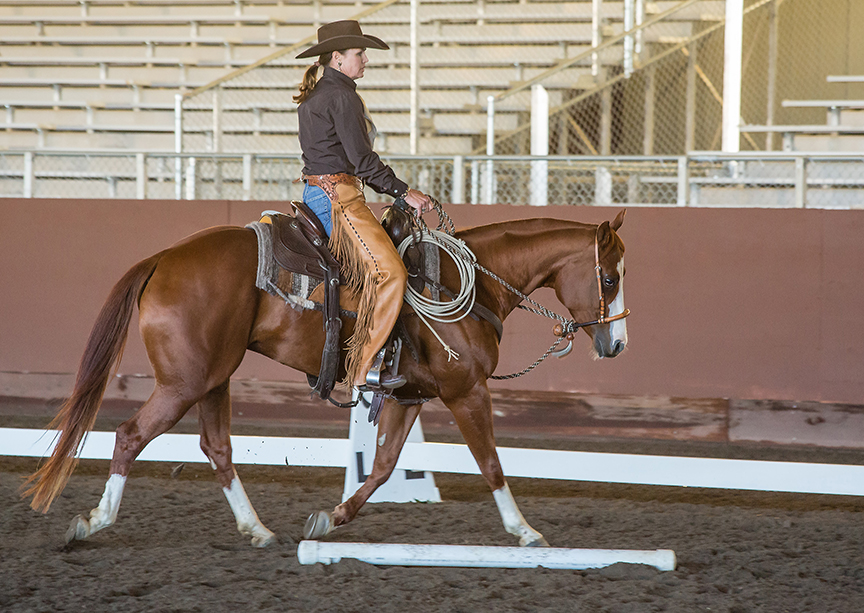
Your hand position in the 10-meter bend is open, allowing the horse to bend within the aids without leaning on them (fig. 7.9). Imagine holding a handlebar while riding in a straight line. If you turn the handlebar to initiate the bend, the inside hand will come back and slightly down, while the outside hand will move forward and slightly up to hold the bend consistently throughout the circle. Consider how your skeleton presents itself in bend, the hands through the reins communicating with the horse’s head, neck, and shoulders, and through the shoulders to the front feet. The hands have no practical effect on the body of the horse. If the horse’s body drifts to the inside of the circle in the bend, it is not corrected by the hands. Discrepancies in the movement of the horse’s body must be corrected through your body (fig. 7.10).
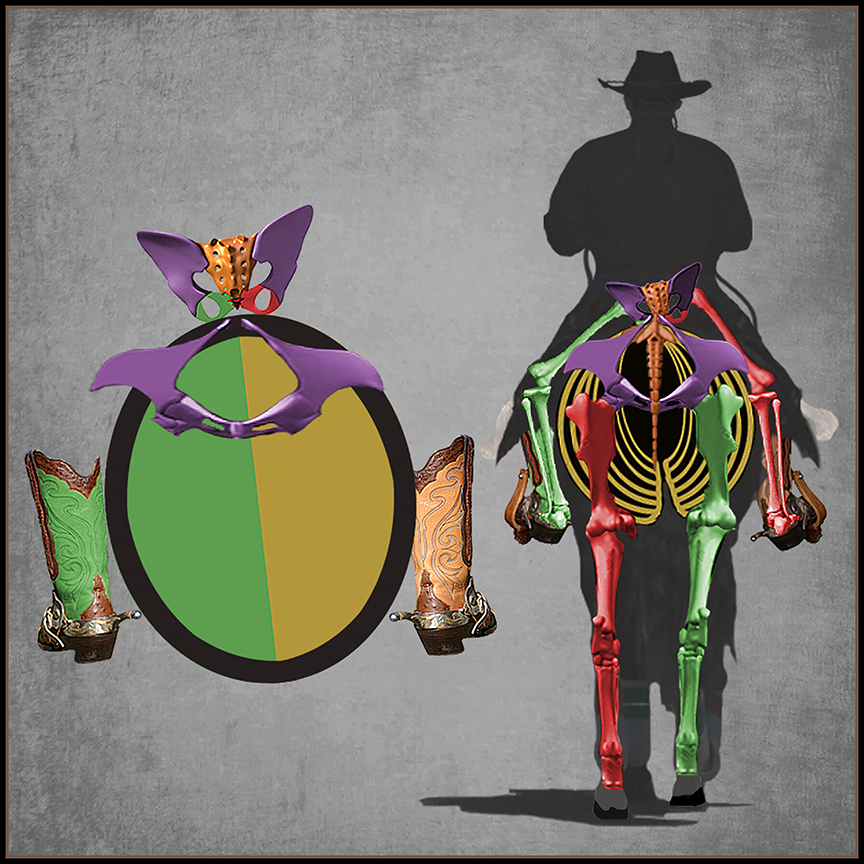
7.10 — The inside leg is essential in creating bend through the rib cage of the horse. While there is minimal lateral flexion in the thoracolumbar spine, the rib cage can “roll,” “giving” to the inside leg, which aids in shortening the inside of the horse’s body, while making room for the inside hind leg to step deeper under it. You can see that the pelvis also affects this roll in the rib cage, and in a more advanced horse, the pelvis plays a stronger roll in this aid than the leg does.
Riding Not Guiding
One of the keys to successfully riding bend and correct 10-meter circles is to realize that you don’t steer the horse through the circle. This is a common misconception in new riders, and micromanagement of the horse through over-correcting through the hands is a sure way to end up riding an “amoeba” rather than a circle, and he will not cultivate self-carriage or Soft Feel.
You create the bend and ride it forward. If you get the correct bend through the horse’s body by establishing the bend in your own body, the only thing required to make the circle work is forward momentum. But, that of course, is in a perfect world where mechanics are more at work than two living, breathing beings trying to dance as one. So, to help correct the horse’s circle and bend through riding rather than guiding, is first important to think about balance.
With each step the horse takes, his balance adjusts to compensate for the movement and shifting of weight-bearing feet. In a four-beat gait like the walk, the balance is shifting with the movement of each foot in the stride. Therefore, in a single walk stride, the balance of the horse and rider will shift four times. If the balance shifts too drastically in a step one direction or the other, suddenly your perfect circle is out of whack. When we spoke of feeling the horse move underneath us and being in tune with the movement of all four feet, the balance of the horse and rider is part of that program.
When you have properly established bend through the horse’s head and the neck, communicating through your hands to the horse’s front feet, but the horse falls to the inside of the circle, you can respond in two ways: If the horse has fallen to the inside of the circle just from loss of balance and not loss of bend, correcting that balance by weighting the outside hip asks the horse to step back onto the outside track and back onto bend. If the horse has fallen to the inside of the circle due to loss of bend through the rib cage, the inside leg can become active to remind the horse to bend around it. If the horse is falling to the outside of the circle through the rib cage because of loss of bend in the hindquarters, the outside leg can ask the horse to step back into bend, while the inside hip is weighted to encourage the horse to step up and underneath himself into the circle.
You may have to adjust your balance to help the horse maintain bend through each step of the circle. These changes in balance are minimal in most cases and not easily observed from the outside. If you dwell on any of these changes for too long, it becomes an over-correction. Like a dancer who stays light on her feet, you must stay light and balanced on your aids to prevent the horse from becoming desensitized to the subtle nuances of riding with the body rather than guiding with the hands.
Exercises in Bend
Like the runner who does toe touches and lunges before heading out for a jog, bend becomes a stretching and suppling exercise as important to the warming up of the horse’s muscles as a good walk. Warming the horse up by moving through 10-meter bend at the walk serves as a checklist of sorts to ensure the horse is moving well and evenly beneath you.
All riders will utilize the Cowboy Dressage Court in their own way to help warm the horse up using bend (fig. 7.11).
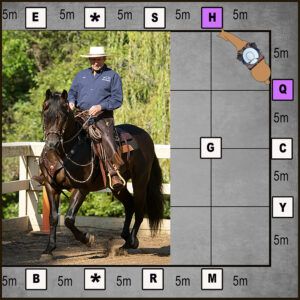
7.11 – The 5-meter grid of the Court means there is a wealth of opportunity for practicing the 10-meter bend. Let your imagination be your guide.
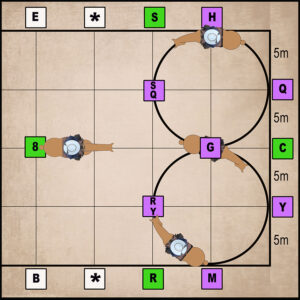
7.12 – The figure-eight exercise with a change of bend at G. You can see that the figure eight is essentially two circles meeting. The change of bend must happen at the intersection of the two circles.
For a young or green horse in need of repetition, working through all 12 of the 10-meter circles on the Court in one direction and then the other direction is one option. For the older schooled horse or one that tires with repetition, this may prove too many circles at once. For those horses, combining 10-meter circles at the working walk with long periods of free walk across the long diagonals is a valuable exercise.
Changing Bend
Changing bend from one direction to the other is also a valuable suppling exercise that helps to build balance in the horse. The ability of the horse and rider to smoothly change from bend in one direction to the other is very important. When changing from a right bend to a left bend, the change in bend is initiated through your skeleton before the change of direction is established with the hands. You initiate the change in bend by changing hips and legs and essentially leg-yielding the horse into the change of direction and bend. The hands follow just a beat behind the change in the body, making the transition seem to occur smoothly over just a step or two within the stride.
If you picture a 10-meter figure eight at G, the change of bend in the body happens just a step before your stirrups pass over G (fig. 7.12). At G, your hands follow the change in bend through the horse’s body to establish the new direction. As you are on a left bend approaching G, your inside leg is the left leg. A step before G, change legs, making contact with the right leg, guiding the rib cage over into the new bend, weighting the left hip, and then changing the bend through the hands. When done correctly and smoothly as viewed from above, the horse will smoothly go from left bend to right bend exactly over G, making the two, 10-meter circles touch at that point. Another way to work on variations of bend is to change through the inside of a circle, as if you are inscribing the Yin Yang symbol on the ground. Practicing smoothly shifting bend through the rib cage, then changing direction with the hands while maintaining the same circle, is a challenging and useful exercise.
The Octagon for Bend
The octagon on the challenge Court is like having your own gymnastic bend tool right in your arena. Using the octagon—or using the octagon with the garracha pole—is an excellent way to teach the horse to bend, and hold the bend, while carrying it forward (fig. 7.13).
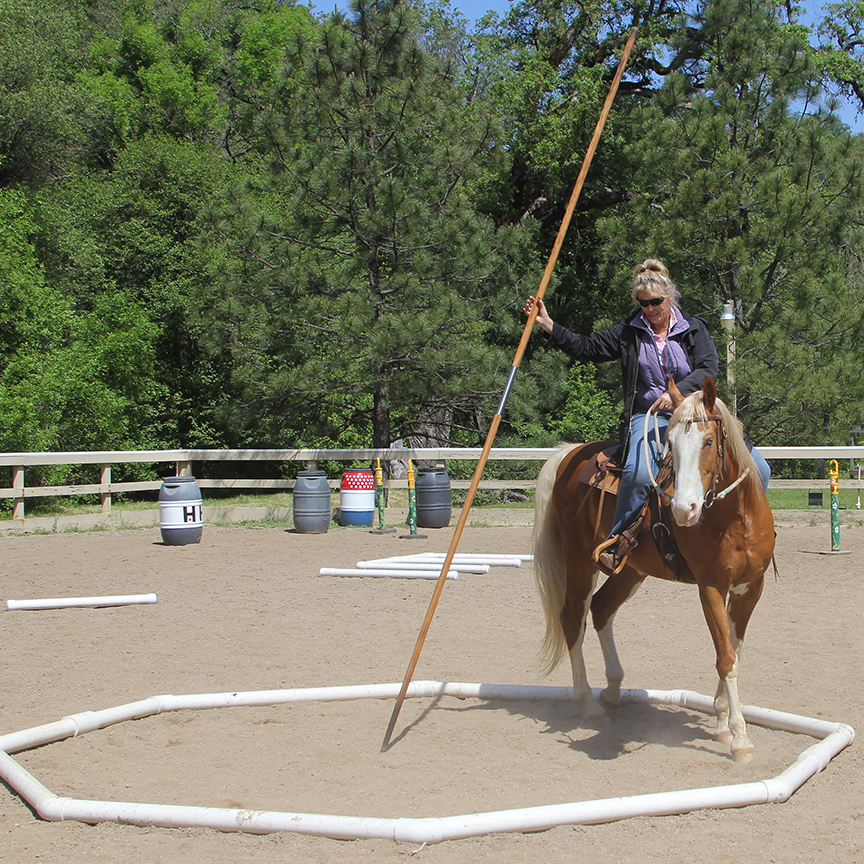
7.13 – A tool for building bend at your disposal is the garrocha pole. You can use the pole just as you use the octagon as a focus for the bend. By keeping the horse’s bend constant around the pole, you can concentrate on creating the bend and riding it forward. It becomes much harder to micromanage the horse when you
are holding onto the reins with one hand and a pole with the other. The combination of the garrocha pole and the octagon just means you have even more ways to help you and your horse develop bend.
The physical presence of the ground poles gives purpose to the horse, more so than he experiences on the Open Court. The octagon is more than a 10-meter bend, even when going around the outside of the poles, so it is more difficult.
The octagon can be used both to teach and to warm the horse up in bend. Riding around the outside of the octagon, ask the horse for bend at each junction of the ground poles by making contact with the inside rein and inside leg at the same time. This is done with rhythm. Once the horse feels good around the outside of the octagon, you can ask the horse to step to the inside and ride him in the smaller circle (fig. 7.14).
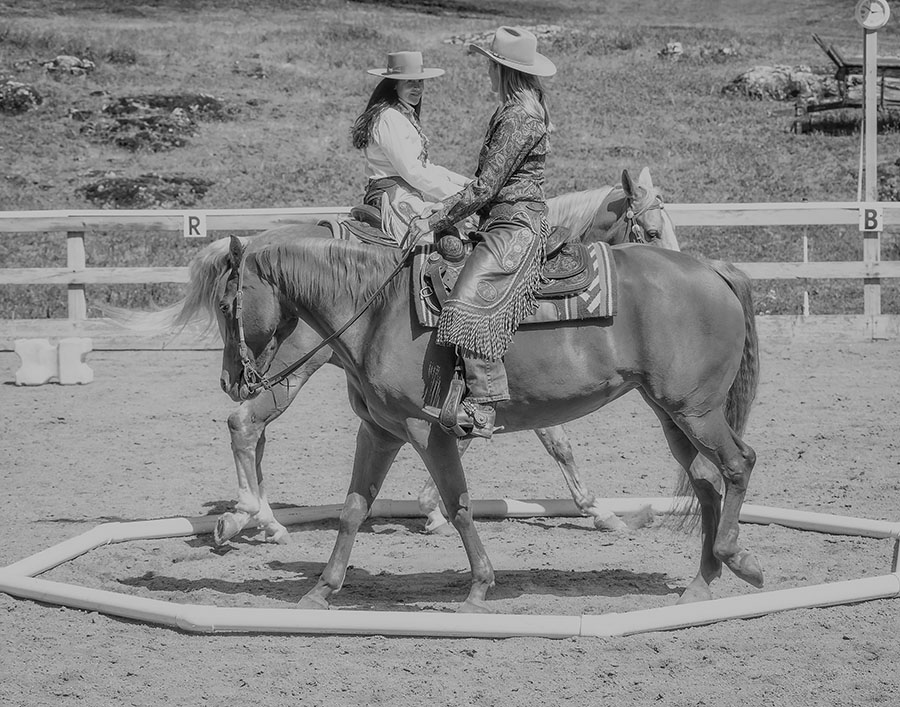
7.14 – The octagon can be used to help a horse develop bend. You can work around the inside or the outside.
Rather than physically pushing the horse into and out of the octagon, think of it as switching your intention from the inside of the poles to the outside. This is a great way to get the horse feeling your weight and center of gravity. When you are on the inside of the octagon, you can shift your weight to the outside of the octagon, allowing the horse to step over with you. You can tell if the horse is following your seat because he will step out with the outside foot and step in with the inside foot. Often, when riders push their horse out of the octagon with the inside rein or leg instead, the horse steps over first with inside leg. Neither is wrong per se, it is just a useful exercise to help the rider be aware of how the aids are affecting the horse’s feet.
Remember not to spend too much time working on bend in or around the octagon as too much bend kills “forward.” If you feel your horse is beginning to drag or lose the forward impulse, take a break, and allow him to free walk for a time before returning to work on bending the opposite direction.
20-Meter Bend
While the 10-meter bend is the bread and butter of the Cowboy Dressage Court, the 20-meter bend, especially as the free jog and working lope, is also an important element. The 20-meter circle is easier in some ways and more difficult in others.
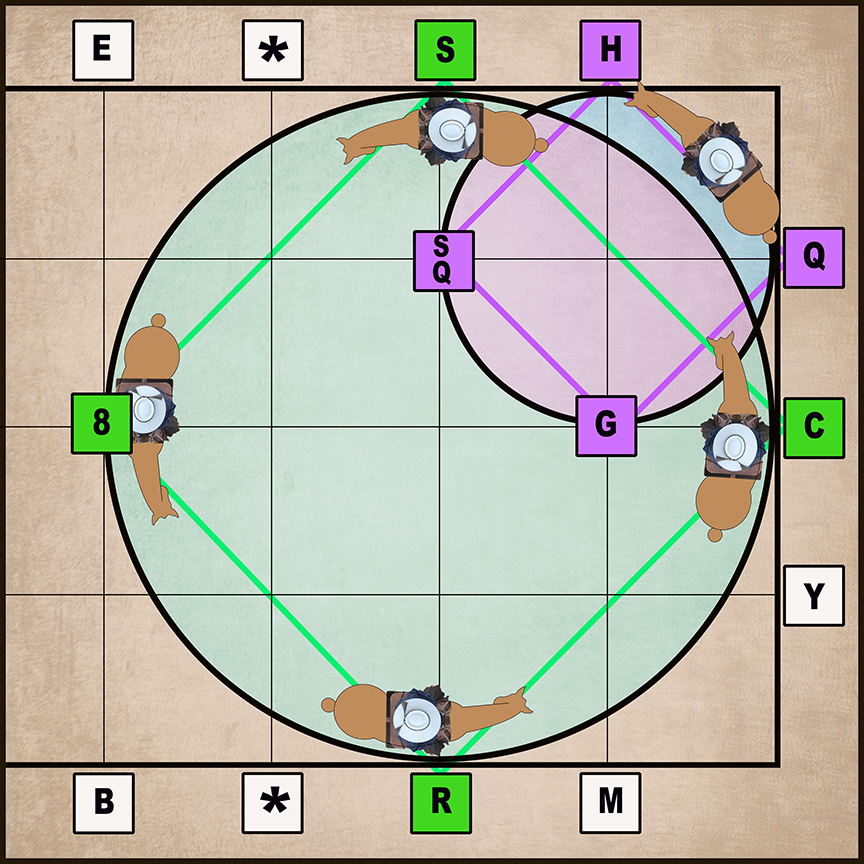
7.15 – Changing from 10- to 20-meter bend is one of the most elemental of the Cowboy Dressage exercises. There are several different places to work on this maneuver on the Court.
The 20-meter circle at the lower-level tests is generally an unwinding exercise used as a break between 10-meter circles to reestablish “forward” while maintaining bend in the horse. The over-application of 10-meter bend, while great for suppleness, can inhibit forward in most horses. And so enter the 20-meter circle, which allows the horse more freedom in forward movement by encouraging stretching of the muscles of bend in the free frame, as well as “greasing the wheels,” so to speak, to keep the horse interested in moving forward. The elements of bend established in the 10-meter bend are the same in the 20-meter bend but applied to a lesser degree (fig. 7.16. There is less bend through the head, neck, body, and pelvis; how- ever, you should be careful not to let the horse become too straight.
Balance and drift in the horse’s body as well as loss of bend become an even greater challenge in the 20-meter circle as it is performed generally in the free frame with longer rein contact. Also, the rider in the free jog is posting, which removes consistent seat aids in the bend. The leg and weight aids, therefore, become even more important in the maintenance of bend in the free gaits (fig. 7.17).
For the horse and rider that find the 20-meter circle a challenge to navigate, beginning by riding that circle as a diamond can be helpful to make sure you are establishing and meeting the touch points on the circle. Physical markers such as cones or barrels at the top and bottom of the 20-meter circle (at B and E) are useful on the Cowboy Dressage Court and Challenge Court, though the Challenge Court does provide the added guides of the diagonal ground poles. By riding the circle first as a diamond, then by thinking about the bend in short one-quarter- circle arcs, many riders have found the 20-meter circle much simpler to achieve.
Counter-Bend
Once the horse has a firm understanding of bend and Soft Feel within the bend, the concept of counter-bend can be introduced to the horse. Counter-bend is a useful suppling exercise and is generally used to gain more control of the horse’s shoulders and strengthen the response to the inside leg and seat aids. Counter-bend is simply a change in direction of travel without a change in bend.
Just as in a regular 10-meter circle in which bend is created and then ridden forward, count- er-bend is best taught in much the same way. From a 10-meter circle with right bend, the horse is ridden to the left holding the 10-meter bend already established to the right. The only thing that changes in either horse or rider is the direction of travel maintained by forward drive in the seat, as well as support through the right leg, which is what helps the horse hold the bend.
Forward drive in the counter-bend is established much the same way as was discussed earlier when we described generating energy
and direction through the rider’s energy center (fig. 7.18).
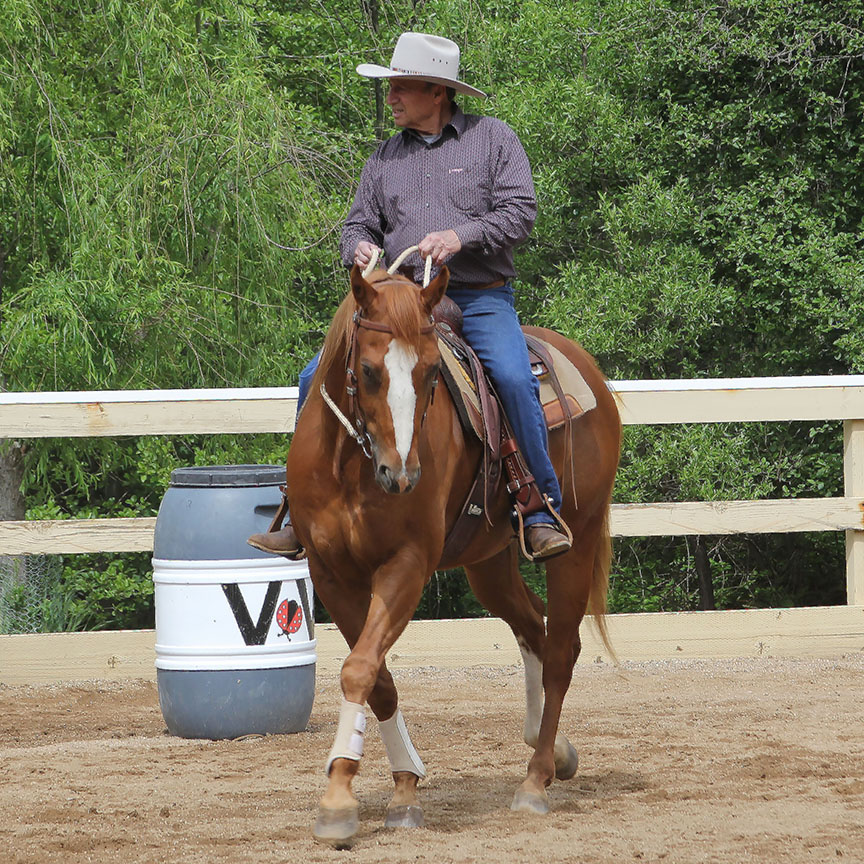
7.18 – In counter-bend, the horse is bent opposite the direction of travel. Here the horse is in left bend and the rider looks to the new direction of travel. Ideally, the rider’s body will still mirror the horse’s body in bend except for the head looking into the new direction. Eitan’s slightly dropped shoulder is the shift in intention and center of gravity in the body. Notice the inside hand has come back toward his belt buckle and toward the horse’s withers, while the outside rein still has light contact to frame the bend.
Your skeleton mirrors the skeleton of the horse but you look into the new direction of travel, casting your energy in that direction. An active inside leg (note that the leg inside the bend becomes the outside leg in the direction
of travel in the counter-bend) helps to guide the horse through the new circle in the counter-bend.
For the horse and rider new to schooling the counter-bend, there are several pitfalls to avoid. First of all, the horse is ridden into the counter-bend and not dragged through the new bend with the hands. Many riders, in an attempt to force the horse over into the new direction, will pull both reins over toward the desired direction of travel. This causes problems for the horse. First, if the horse is in right bend and the rider pulls the right rein over the withers and across the neck to the left in an attempt to steer the horse that direction, the horse will become over- bent and will lock up the right shoulder. For the horse to step lightly through the counter-bend in Soft Feel and forward movement, the left leg needs to reach out into the new direction, while the right leg steps forward and across the chest in travel. If the right shoulder is locked up by the head and neck being pulled too far backward and to the left (while still bending to the right) by the right rein across the withers, the right shoulder will not be free to step across the chest.
Therefore, as when establishing a regular 10-meter bend, the right hand (when bending to the right) should remain open to allow the horse to look toward the hand. The left hand that was holding the outside rein in gentle contact with the left shoulder can open outward into the direction of travel, without creating backward pressure on the bit and counteracting the right bend. By opening the left hand, you allow room for the horse’s left front leg to move into the new direction through the counter-bend.
Initially, this change of direction without change of bend will confuse the horse, as you have likely worked hard to establish the concept of “where the nose goes, so shall you,” by always asking the horse to look into the direction of travel. Therefore, as this more physically difficult task is introduced, the horse should only
be asked for a few steps of counter-bend before being released and praised so that he can build on small incremental steps. When releasing the counter-bend, you should wait until the horse has moved at least one step correctly, and also be sure that the horse is in Soft Feel and not pulling on your hands. This will be an easier goal to meet if you are not trying to do too much with the reins.
The counter-bend exercise is most easily introduced to horse and rider in the 10-meter figure eight. If using the Challenge Court, it is easier to place your figure eight at D instead of G because the ground poles are unnecessary obstacles during this exercise. Depending on your arena and your horse, you may find that asking for the counter-bend as you are traveling up the center- line at D toward “8” is easier for the horse than when you are traveling down the center line at D toward the rail. For some horses, the rail can be an aid to understanding counter-bend but for others, it seems to create a sense of claustrophobia, which can cause both horse and rider to lock up.
Read more at:
Dressage the Cowboy Way
THE COMPLETE Guide to Training Riding with Soft Feel and Kindness. Paperback – Eitan’s new Book Coauthored by Jenni Grimmett DVM.
http://cowboydressage.com/storefront.html
![]()

